Main menu
You are here
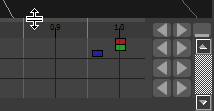
Time Line
The timeline represents the position of keys for any animation.
It contains:
- Keys
- Time Slider
- Time Display
- Navigation Buttons
- Expand Button

See also: Animation Tutorial, Animation
If BS Content Studio is in animation mode then the time line change its color to red. With a red timeline all field changes will create an key on the current Time Slider position.

There are several key types that represents different animation methods.
- Red stands for translations
- Green stands for rotations
- Blue stands for scales
- Black stands for all other animations

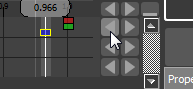
To set the time position move the Time Slider with the left mouse button down to the wished position. The current time position is displayed within the Time Slider.

To select a key click on a key with the left mouse button. The selected key is now displayed with a yellow border. The Time Slider will move to the key position.

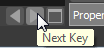
Another way to select a key is to push one of the navigation buttons. The first navigation button selects the previous key. The second one selects the next key.
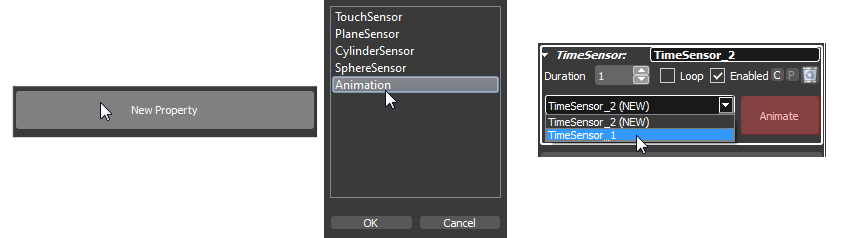
To create a key BS Content Studio must be in animation mode (red background). To set BS Content Studio to animation mode enlarge a TimeSensor rollout in the property view and click the animate button. The timelines background will change his color to red. BS Content Studio is now in animation mode.
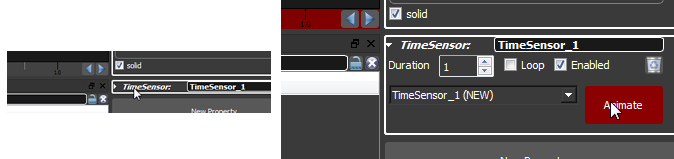
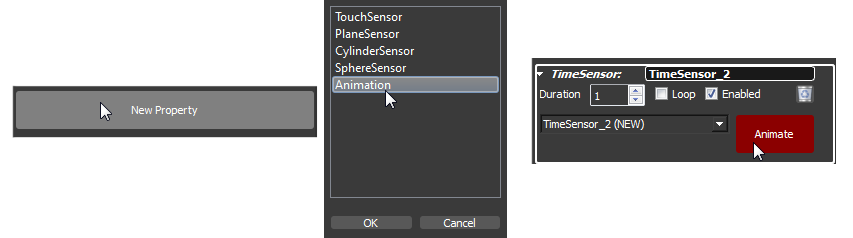
If you don't have a TimeSensor rollout you have to create a new animation first. To do so click the New Property Button in the property view and select Animation in the following dialog. Now you can set BS Content Studio in animation mode by clicking the Animate button in the TimeSensor rollout.
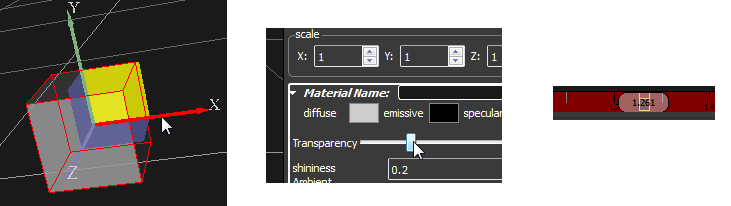
If BS Content Studio is in animation mode move the Time Slider to the position where you wish to create a new key.

Now change a value of your selected
object with one of the transform handlers  from the main tool bar or by changing one of the fields in the property view. Now you have created a new key.
To modify a key set BS Content Studio to animation mode (the background of the timeline must be red) and select the key to modify either by clicking the key or by selecting the key with one of the two navigation buttons on the right side of the timeline. The selected key changes its border color to yellow.

Now change a value of your selected
object with one of the transform handlers from the main tool bar or by changing one of the fields in the property view.
The selected key is modified.
To change the time value of a key click on the key with the left mouse button and move it to the wished position.

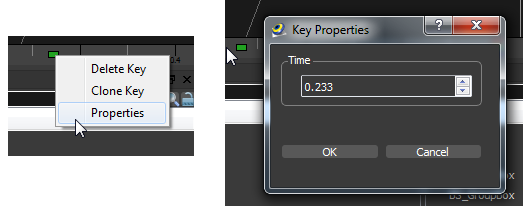
Another way to set the time value of a key is to right click the key and select Properties in the appearing context menu. Now you can set the time position exactly.
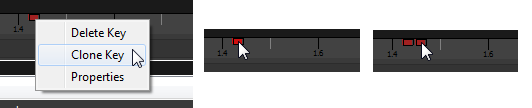
To clone a key right click the key and select Clone Key in the appearing context menu. Now the cloned key is exactly on the same position as the original key. Move the cloned key to the wished time position with the left mouse button down.
To remove a key right click the key and select Delete Key in the appearing context menu.

To animate a second object within an existig animation click the New Property Button in the property view and select Animation in the following dialog. Now you can choose an existing animation (TimeSensor) in the ComboBox in the TimeSensor rollout. After that set BS Content Studio in animation mode by clicking the Animate button.
You will see all keys of the choosen animation in the timeline. Move the Time Slider to the position where you wish to create a new key.

Now change a value of your selected
object with one of the transform handlers from the main tool bar or by changing one of the fields in the property view. Now you have created a new key.
To maximize the timeline click the Maximize Button on the right side of the timeline.

The timeline expands and shows the keys of each single animated object in a seperate row. By clicking the Minimize Button the timeline will reduce it´s size to a single line.

The selected Object will be highlighted in blue color.

On the top you can resize the timeline.
Each object has its own Navigation Buttons.
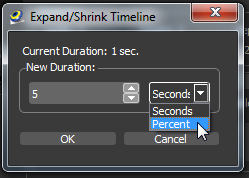
To append time to the timeline or cut time from the timeline click the Expand/Shrink Timeline Button in the Timesensor Rollout.
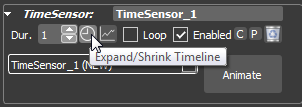
In the appearing dialog you can set the new duration you need for your animation.